In this article I discuss the following layer modes: Grain Extract, Grain Merge,
Divide, Hue,
Saturation, Color,
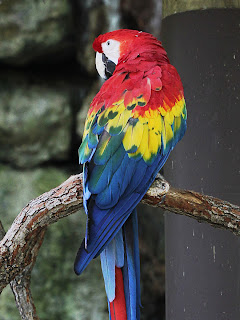
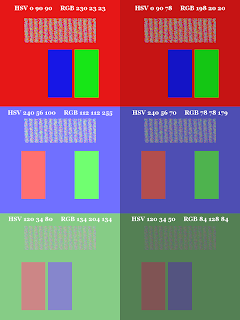
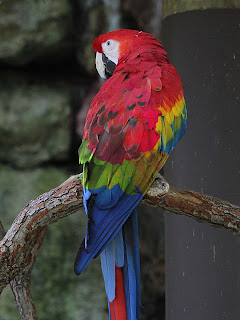
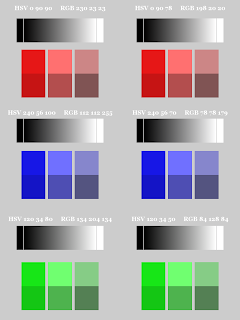
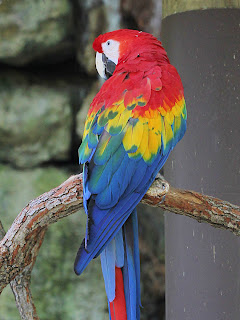
and Value. I will use the same test images I used for Part 1 and Part 2.
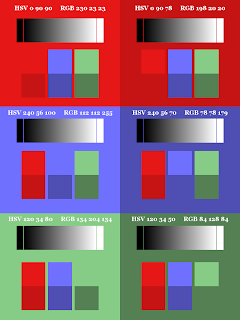 |
| Color Patterns on Color Blocks |
|
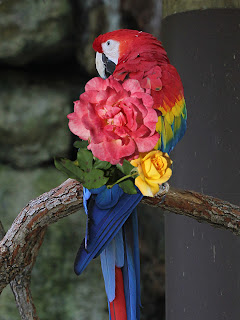 |
| Roses on Macaw |
|
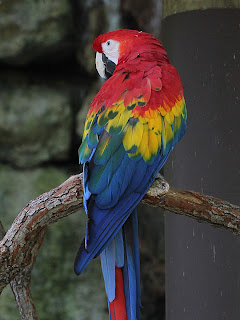 |
| Macaw |
|
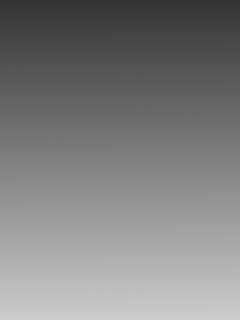 |
| Grayscale Gradient |
|
For each of the test images, I changed the layer mode of the upper layer to each mode and saved the result. I've included these images in each section below as references. What follows are my observations and thoughts about how to use each layer mode. Feel free to copy any of these images to your desktop so you can load them into GIMP for a closer look.
The layer modes are presented in the order in which they appear in the Mode drop-down menu. Here's a full list with quick links.
The main purpose of Grain extract is to extract the “film grain” from an image, then use the result with Grain merge to sharpen the image or give it an embossed appearance. According to the user's manual, the pixel value of the upper layer is subtracted from that of the lower layer, then 128 is added to the result.
As can be seen from the test images, Grain extract can also be used to cause interesting changes in color images.
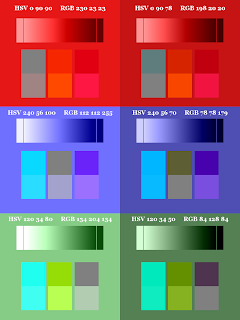 |
Color Pattern; Small Blocks on Top;
Mode Grain Extract |
|
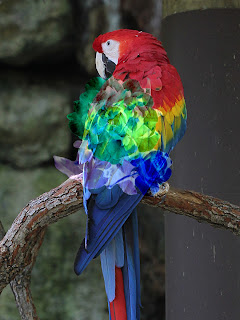 |
Photo Overlay;
Mode Grain Extract |
|
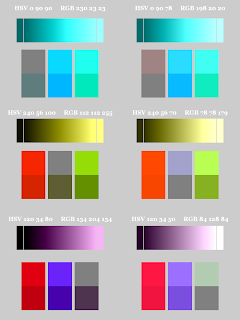 |
Color Pattern; Small Blocks on Bottom;
Mode Grain Extract
(Gray background represents transparency.) |
|
|
Observations:
It matters which layer is on top.
A color grain-extracted with itself results in medium gray (RGB 128, 128, 128).
If the upper layer is grayscale and the lower layer is color, dark grays and black brighten and desaturate the color below, and light grays and white darken and saturate the color below.
If
the upper layer is color and the lower layer is grayscale, the
resulting color is the complement (inverse) of the original color.
Dark grays and black darken and saturate the color. Light grays and
white lighten and desaturate the color.
If
both layers are color, the color on the bottom layer dominates. The
closer in hue the two colors are, the more gray the result. The
farther apart in hue the two colors are, the more saturated the
result. The brightness of the result is closer to the brightness of
the color on the lower layer.
Thoughts:
Use
Grain extract with a grayscale upper layer and a color lower
layer to either lighten and desaturate (dark grays and black) or
darken and saturate (light grays and white) the lower layer.
Use
Grain extract with a color upper layer and a grayscale lower
layer to invert the colors of the upper layer.
Use
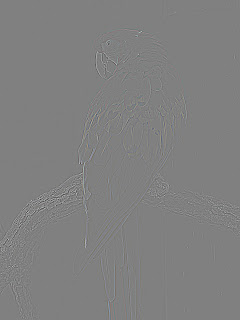
Grain extract on a color-inverted copy of an image to darken
and saturate the original image below.
Use
Grain extract on a blurred copy of an image to extract the
grain (edges) of the image. Use New from Visible to create a
layer of the grain, then set its Mode to Grain merge
to sharpen the image below (after hiding or deleting the blurred
layer). Smaller blur values create finer grain; larger blur values create coarser grain.
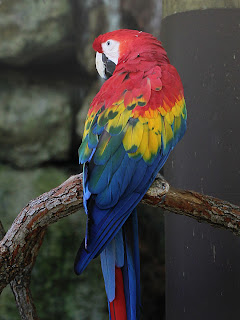 |
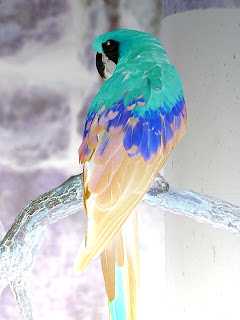
Macaw + Grayscale Gradient Upper Layer;
Mode Grain Extract; Opacity 50% |
|
 |
Macaw + Grayscale Gradient Lower Layer;
Mode Grain Extract; Opacity 100% |
|
 |
Macaw + Color-Inverted Duplicate;
Mode Grain Extract; Opacity 50% |
|
 |
Macaw + Duplicate Blurred by 5;
Mode Grain Extract; Opacity 100% |
|
See the following articles for examples that use Grain extract mode.
-
-
-
- GIMP Magazine Issue 4 – Portraiture (pages 88-94)
Grain merge does the opposite of Grain extract, merging an upper “grain” layer onto the lower image. It adds the pixel values of the upper and lower layers, then subtracts 128. This layer mode is very useful for sharpening or embossing an image.
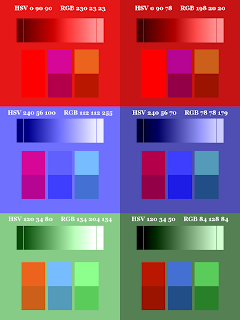 |
| Color Pattern; Mode Grain Merge |
|
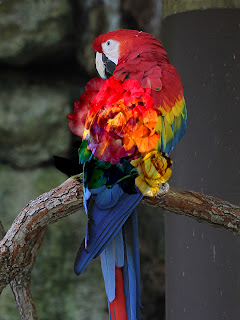 |
| Photo Overlay; Mode Grain Merge |
|
Observations:
It
does not matter which layer is on top.
If
one layer is color and the other is grayscale, the color of the
result is taken from the color layer. Darker grays and black darken
and saturate the result. Lighter grays and white brighten and
desaturate the result.
If
both layers are color, the result can have a radical change in hue.
Red has a dominating effect, blue a medium effect, and green the
least effect. The more similar in hue the two colors are, the more
saturated the result.
Thoughts:
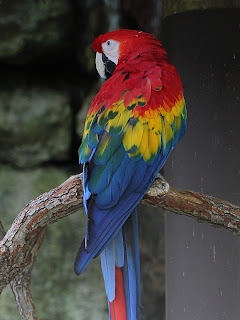 |
Macaw + Grayscale Gradient;
Mode Grain Merge; Opacity 50% |
|
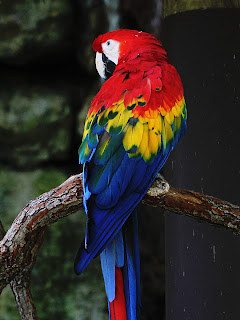 |
Macaw + Duplicate;
Mode Grain Merge; Opacity 50% |
|
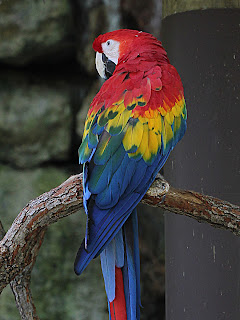 |
Macaw + Grain-Extracted Image;
Mode Grain Merge; Opacity 50% |
|
|
See the following articles for examples that use Grain merge mode.
Comment on Grain Extract/Merge by User "dd" on GimpChat
Grain merge and Grain extract are my favorite layer modes. They're versatile and useful for many purposes - they're powerful, yet simple. They can be used for texturing, lighting, shading, beveling, embossing... many things.
Grain merge can basically be understood as converting the top layer's pixel values (0 to 255) into signed integers (-128 to 127), then adding them to the pixel values of the image below. Grain extract is the opposite of that. It converts the top layer to signed integers, but then substracts them from the image below.
Basically, with Grain merge, any value above medium (>128) makes the result lighter, while any value below medium (<128) makes the result darker. This is why it works so well for bevels and embosses. Since Grain merge/extract uses addition/subtraction, the lightness of the base layer gets adjusted linearily, making it easily predictable, which makes it easy to figure out the correct values for your bevel/emboss/texture, etc.
These two layer modes also work per color channel, so you can use Grain merge for linear color adjustments. For example, making red 138, green 128, and blue 118 would modify the base layer so that red gets +10, green is unchanged, and blue gets -10. There are lots and lots of effects and adjustments that you can make with only Grain merge/extract and some math.
The downside is that the effect may not be entirely natural-looking for all applications, especially if you want to create realistic lighting schemes. For such applications, it's better to use Soft light, Hard light, or some combination of Multiply, Addition, and/or Screen.
Divide mode strongly lightens an image, easily burning it out. According to the user's manual, each pixel in the lower layer is multiplied by 256. The result is divided by the corresponding pixel on the upper layer plus 1.
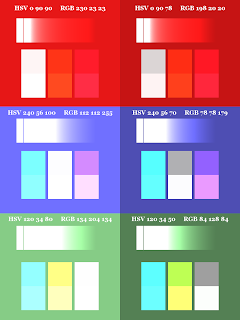 |
Color Pattern; Small Blocks on Top;
Mode Divide |
|
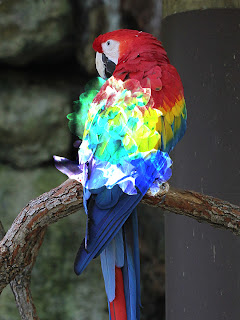 |
Photo Overlay;
Mode Divide |
|
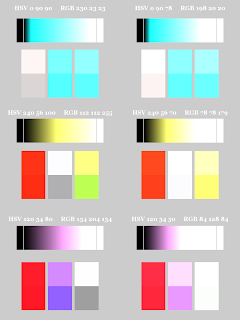 |
Color Pattern; Small Blocks on Bottom;
Mode Divide
(Gray background represents transparency.) |
|
|
Observations:
It matters which layer is on top.
If the upper layer is grayscale and the lower layer is color, black and dark grays result in white. White and light grays have little to no effect on the result. The darker the gray, the more it desaturates and brightens the result.
If the lower layer is grayscale and the upper layer is color, black and dark grays result in black, white and light grays result in white, and medium grays invert the color. The lighter the gray, the more it desaturates and brightens the result.
If both layers are color, the color of the lower layer tends to dominate. Red on the lower layer has the strongest effect on the result, blue on the lower layer has a medium effect, and green on the lower layer has the weakest effect. Color inversion often occurs when two colors are combined.
Thoughts:
Use Divide mode with an upper grayscale layer and a lower color image to desaturate and brighten the color image. A solid gray layer, a grayscale gradient layer, and a desaturated or inverted desaturated copy of the color image can be used for varying effects.
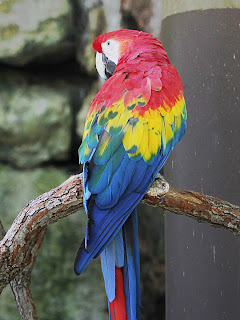 |
Macaw + Grayscale Gradient;
Mode Divide; Opacity 50% |
|
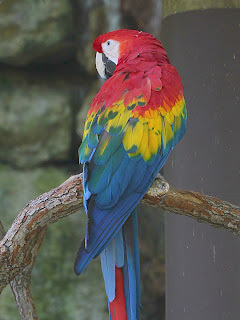 |
Macaw + Desaturated Duplicate;
Mode Divide; Opacity 15% |
|
 |
Macaw + Inverted Desaturated Duplicate;
Mode Divide; Opacity 50% |
|
|
Hue mode creates the result from the hue of the upper layer and the saturation and value of the lower layer. However, if the saturation of either layer is zero, the hue is taken from the lower layer.
 |
| Color Pattern; Small Blocks on Top; Mode Hue |
|
 |
| Photo Overlay; Mode Hue |
|
 |
Color Pattern; Small Blocks on Bottom; Mode Hue
(Gray background represents transparency.) |
|
|
You'll notice in the color pattern example with the grayscale gradient on the upper layer that the result is a multi-colored banding. On close
examination I found that a grayscale FG to BG (RGB) gradient created with the Blend tool, a foreground color of black, and a background color of white creates pixels with hue and saturation
instead of leaving them set to 0. FG to BG (HSV...) also has the same effect. The saturation is very low (< 10), so the color is generally not noticeable and looks gray, though artifacts like this will appear in the image when certain layer modes are used (like Hue, Saturation, Color, Dodge, and Burn). I eventually found out this is due to having the Dithering option turned on in the Blend tool's options. The purpose of this option is to minimize the appearance of banding with gradients, which occurs because GIMP 2.8 handles only 8-bit color. Here's what the color pattern created with dithering turned off looks like in Hue mode:
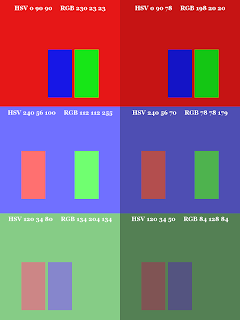 |
Color Pattern; Small Blocks on Top;
Mode Hue; No Dithering in the Gradients |
Observations:
It
matters which layer is on top.
If the
upper layer is grayscale and the lower layer is color, then the
result is the lower color image.
If the
upper layer is color and the lower layer is pure grayscale (no hue
or saturation), the result is the lower grayscale image.
If
both layers are color, then the result is the hue of the upper layer
and the saturation and value of the lower layer.
Thoughts:
Use
Hue mode on a solid color or variable-colored upper layer
over a color image to change that image to the given
color(s).
Set
Hue mode on a duplicated layer of an image, then use Colors
> Curves (or any color adjustment tool) on the duplicated layer to change the hue
without changing the saturation or the brightness.
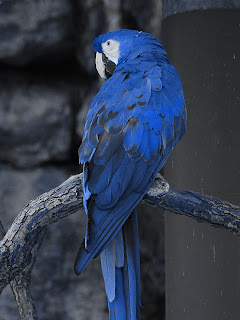 |
Macaw + Blue 416cbc;
Mode Hue; Opacity 100% |
|
 |
Macaw + Duplicate Level-Adjusted 199,87;
Mode Hue; Opacity 100% |
|
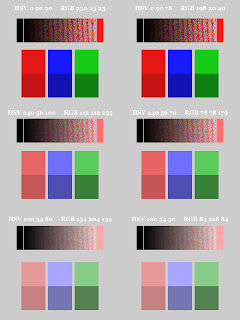
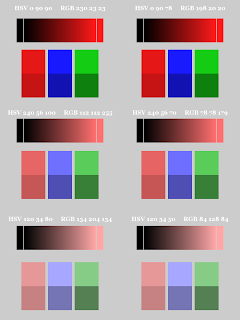
Saturation mode creates the result from the saturation of the upper layer and the hue and value of the lower layer. If the saturation is zero, then the hue is set to zero. When a grayscale gradient is involved, the result varies depending on whether or not the Dithering option was set when the gradient was created. (See more info at Hue.)
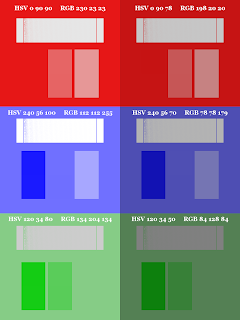 |
Color Pattern; Small Blocks on Top;
Dithered Gradient; Mode Saturation |
|
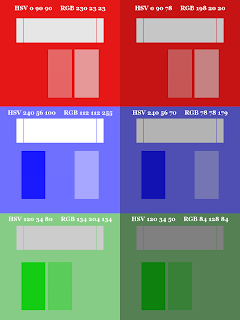 |
Color Pattern; Small Blocks on Top;
Non-Dithered Gradient; Mode Saturation |
|
 |
Color Pattern; Small Blocks on Bottom;
Dithered Gradient; Mode Saturation
(Gray background represents transparency.) |
|
 |
Color Pattern; Small Blocks on Bottom;
Non-Dithered Gradient; Mode Saturation
(Gray background represents transparency.) |
|
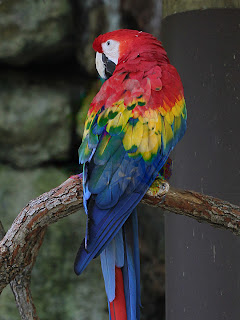 |
| Photo Overlay; Mode Saturation |
|
|
Observations:
It
matters which layer is on top.
If the
upper layer is grayscale and the lower layer is color, the result is
a shade of gray where the hue and saturation are zero and the value
is the value from the lower color layer.
If the
upper layer is color and the lower layer is grayscale, black results
in black and all shades of gray through white result in a change in
saturation of the color.
If
both layers are color, the result is the color on the lower layer
with its saturation changed to that of the upper layer.
Thoughts:
Use
Saturation mode on a grayscale upper layer over a color image
and adjust the opacity to desaturate the color image.
Use
Saturation mode on a color upper
layer that has different or variable saturation over a color image to change the saturation of the color
image.
Set
Saturation mode on a duplicated layer of an image, then use
Colors > Curves (or any color adjustment tool) on the duplicated layer to change
the saturation without changing the hue or the brightness.
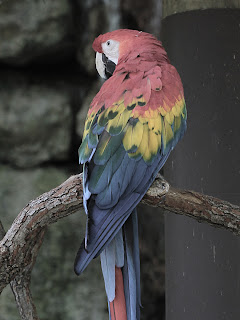 |
Macaw + Grayscale Gradient;
Mode Saturation; Opacity 50% |
|
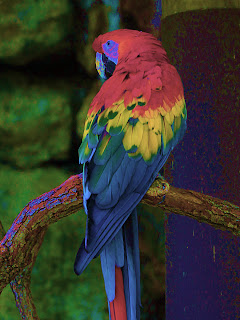 |
Macaw + Blue 416cbc;
Mode Saturation; Opacity 100% |
|
In the right-hand image above, even though the macaw's face looks white in the original photo, it has subtle color variations. Changing the saturation brings out these variations.
 |
Macaw + Duplicate Level-Adjusted 209,148;
Mode Saturation; Opacity 100% |
See the following article for an example that use Saturation mode.
Color mode creates the result from the hue and saturation of the upper layer and the value of the lower layer. There is some math involved to convert the HSV value to an RGB value, so the final HSV number does not look like a strict replacement of the value component. (See Converting to RGB.)
When a grayscale gradient is involved, the result varies depending on whether or not the Dithering option was set when the gradient was created. (See more info at Hue.)
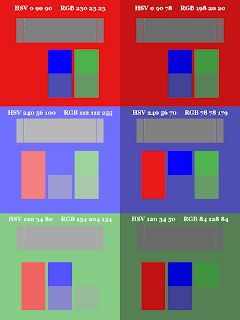 |
Color Pattern; Small Blocks on Top;
Dithered Gradient; Mode Color |
|
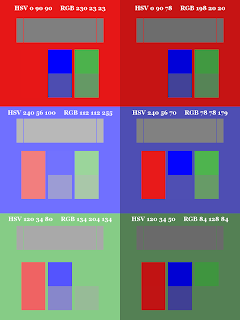 |
Color Pattern; Small Blocks on Top;
Non-Dithered Gradient; Mode Color |
|
 |
Color Pattern; Small Blocks on Bottom;
Dithered Gradient; Mode Color
(Gray background represents transparency.) |
|
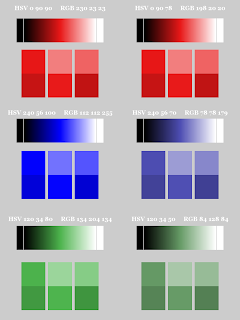 |
Color Pattern; Small Blocks on Bottom;
Non-Dithered Gradient; Mode Color
(Gray background represents transparency.) |
|
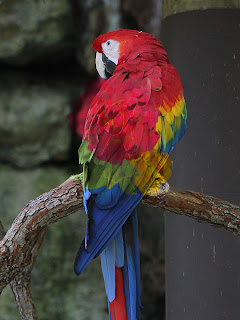 |
| Photo Overlay; Mode Color |
|
|
Observations:
It matters which layer is on top.
White on the lower layer results in white.
Black on the lower layer results in black.
It's
quite likely that the saturation of the result will be different
from that of the upper layer.
If the
upper layer is grayscale and the lower layer is color, the result is
gray, where the hue and saturation are zero and the brightness is
determined by the lower layer. The value of the result is always
darker than that of the color layer.
If the
upper layer is color and the lower layer is grayscale, the result
has the hue of the upper layer. The lighter the gray, the less
saturated the result. The darker the gray, the more saturated the
result.
If
both layers are color, the result has the hue of the upper layer. A
darker color on the upper layer will tend to decrease the saturation
of the result. A lighter color on the upper layer will tend to
increase the saturation of the result.
Thoughts:
Use
Color mode on a grayscale upper layer over a color image and
adjust the opacity to desaturate and darken the image.
Use
Color mode on a solid color or variable-colored layer above a
color or grayscale image to change that image to
the given color(s). There are interesting lighting differences between
a colored color image and a colored grayscale
(luminosity-desaturated) version of the same image.
Set
Color mode on a duplicated layer of an image, then use Colors
> Curves (or any color adjustment tool) on the duplicated layer to make adjustments
to the color of the image.
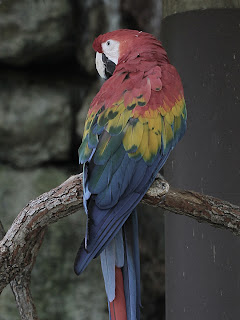 |
Macaw + Grayscale Gradient;
Mode Color; Opacity 50% |
|
|
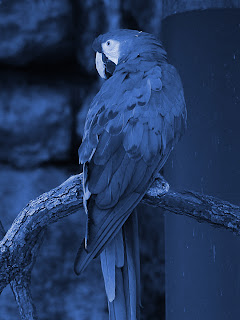 |
Color Macaw + Blue 416cbc;
Mode Color; Opacity 100% |
|
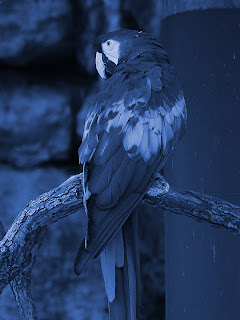 |
Luminosity Desaturated Macaw + Blue 416cbc;
Mode Color; Opacity 100% |
|
 |
Macaw + Duplicate Level-Adjusted 199,87;
Mode Color; Opacity 100% |
|
|
See the following articles for examples that use Color mode.
Value mode creates the result from the value of the upper layer and the saturation and hue of the lower layer. The saturation of a result pixel may vary by a small amount (usually by only 1 point) from the original saturation, and the value may vary somewhat, also. This is because there is some math involved to convert the HSV value to an RGB value. (See Converting to RGB.)
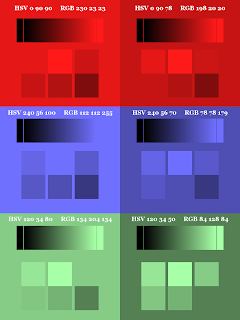 |
| Color Pattern; Small Blocks on Top; Mode Value |
|
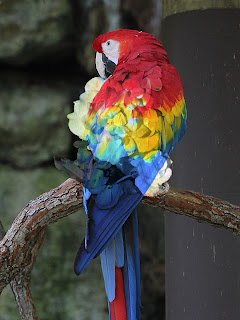 |
| Photo Overlay; Mode Value |
|
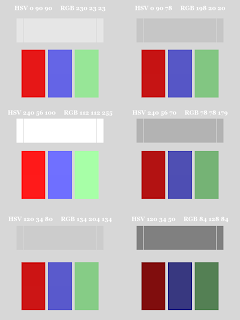 |
Color Pattern; Small Blocks on Bottom; Mode Value
(Gray background represents transparency.) |
|
|
Observations:
It matters which layer is on top.
Black on top results in black.
If the
upper layer is color and the lower layer is grayscale, the result is
a shade of gray, where the hue and saturation are zero and the
brightness is that of the upper layer.
If the
lower layer is color, the result has the hue and saturation of the
lower layer and the brightness of the upper layer.
Thoughts:
Use
Value mode on a grayscale upper layer over a color image to
adjust the brightness without affecting the hue, and only minimally
affecting the saturation.
Set
Value mode on a duplicated layer of an image, then use Colors
> Curves (or any color adjustment tool) on the duplicated layer to make adjustments
to the brightness and contrast of the image without affecting the
hue and saturation.
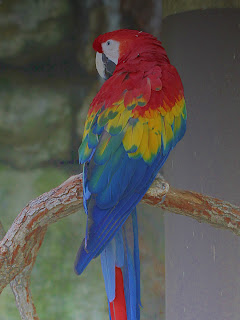 |
Macaw + Grayscale Gradient;
Mode Value; Opacity 50% |
|
 |
Macaw + Duplicate Level-Adjusted 95-146;
Mode Value; Opacity 100% |
|
See the following articles for examples that use Value mode.
If you're interested in experimenting with even more layer modes, install G'MIC. In G'MIC's Layers list is an entry called Blend
[standard]. This filter has over 40 blend modes, including such modes as Average, Freeze, Interpolation, Stamp, and Vivid Light.
I would like to thank various people on the #gimp IRC chat channel for their time and effort to make clear some of the oddities I ran across while writing this article. I would also like to thank my husband for giving me insight into the relationship between HSV and RGB. I very much appreciate the help and support of all these people.
If you have specific uses not mentioned here for any of the layer modes, please leave a comment. I'd love to hear about it.


No comments:
Post a Comment