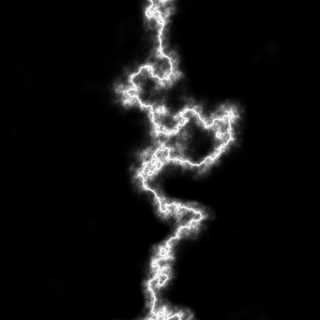
GIMP is really useful for adding
special effects to photos and drawings. In this article I'll describe
a simple method for creating lightning bolts that can then be
resized, reoriented, scaled, or otherwise processed to fit into an
image.
Step 1 – Create a Grayscale Gradient
To begin, you'll need a black to white
gradient as a base. Create a new canvas of any size, set your
foreground and background colors to black and white (shortcut D)
[1], select the Blend tool (shortcut L) [2], make sure
the Gradient is FG to BG (RGB) [3] and the Shape
is Linear [4], then drag your mouse from one side of the
canvas to the other.
Step 2 – Overlay Difference Clouds
To create a proto-lightning bolt,
choose Filters > Render > Clouds > Difference Clouds [5].
Turn the Detail all the way up to 15 [6] and click OK [7]. This will change your gradient layer so that it looks cloudy, but you'll see that there's a black streak that runs from one side of the canvas to the other.
You'll note that the dialog box that pops up for Difference Clouds is called Solid Noise. This is because the Difference Clouds filter effect is achieved by running the Solid Noise filter (Filters > Render > Clouds > Solid Noise) to generate a new layer, changing the Mode of that layer to Difference, and then merging that layer with the layer below.
Step 3 – Invert the Colors
To create a white lightning bolt, choose Colors > Invert [8]. Wow, that's pretty impressive! But you're not done yet.
Step 4 – Remove the Unwanted Areas
The quickest way to remove most of the unwanted cloudy areas is to use Colors > Levels [9]. In the Levels dialog, grab the middle Input Levels triangle and drag it far to the right [10] until you have mainly a lightning bolt with some fuzz around it. Click OK [11].
Next, right-click on the lightning bolt layer and choose Add Layer Mask [12]. Select Grayscale copy of layer [13] and click Add [14]. This will replace the dark background with transparency so that you can overlay the lightning bolt onto another image.
Finally, use the Paintbrush tool (shortcut P) [15] with a large soft black brush on the mask to erase the rest of the unwanted areas. You may find it helpful to create a colored layer underneath so that you can see better what you're doing.
And there you have it! A lightning bolt in four quick and easy steps.
Creating Different Directions
You can affect the size and direction of a lightning bolt by changing the size and direction of the gradient. You'll note that the lightning bolt always follows along the middle gray area of the gradient in a direction perpendicular to the direction in which you dragged the mouse to create the gradient.
Here are four different gradients created in four selected regions on one canvas.
And here are the lightning shapes created by running Difference Clouds once on the entire canvas, then inverting the colors and adjusting the levels.
Creating Different Shapes
You can generate differently-shaped lightning bolts by choosing different Random seed values in the Solid Noise dialog.
You can also create other kinds of lightning shapes by starting with different gradients.
These lightning bolts were created by starting with a gradient Shape of Bi-linear.
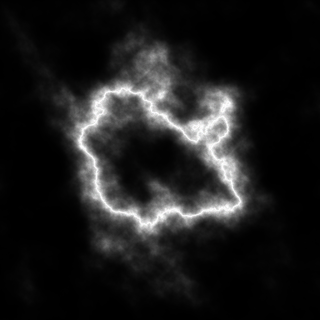
This curved lightning was created with a gradient Shape of Radial.
This crazy lightning shape was created with a gradient Shape of Conical (sym).
Creating Different Fuzz Effects
If you want more of a neon glow look than a cloudy lightning look, you can set the Detail to 1 in the Solid Noise dialog.
It's a lot of fun to experiment with different gradients, random seeds, and detail to see what you get.
Also, keep in mind that any narrow grayscale gradient created with any method and moving along any direction, either straight or curvy, can be used to create lightning bolts.
Acknowledgement
Thanks to Alex Standiford's tutorial for giving me the idea to experiment with this technique to understand a bit about how it works.


This is a great sharpening technique, both simple and effective--attributes that seem mutually exclusive in other methods.
ReplyDeleteThere's another non-destructive sharpening technique that involves using Wavelet decompose, but I like this one because it's quick and easy.
ReplyDeleteGreat information. I really like your article. Your way to enlighten everything on this blog is actually pleasant. Thanks for sharing it with us.
ReplyDeleteYou're quite welcome. I love writing technical articles and tutorials. I try to write them in a way that I would find useful as a reader since I rely pretty heavily on tutorials I find on the web to help me learn stuff.
ReplyDeleteYou're most welcome. Have fun playing with the technique!
ReplyDelete