Contents ~ Posts ~ Free Images ~ GIMP 2.8 Shortcuts ~ Studio Dalio Gallery

24 December 2013

GIMP's Layer Modes (Somewhat) Demystified – Part 4: A Pictorial Comparison

For a final comparison among the layer modes, I created several examples that visually show the effects of combining various layers.

Grayscale on Grayscale


First, I created a square non-dithered grayscale linear gradient lower layer, then made a copy and rotated it 90º for the upper layer. I chose each layer mode to see the effect. Here's a visual representation of what occurs with each layer mode.

17 December 2013

GIMP's Layer Modes (Somewhat) Demystified – Part 3: Grain Extract to Value


In this article I discuss the following layer modes: Grain Extract, Grain Merge, Divide, Hue, Saturation, Color, and Value. I will use the same test images I used for Part 1 and Part 2.


Color Patterns on Color Blocks
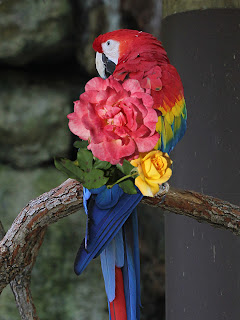
Roses on Macaw
Roses on Macaw
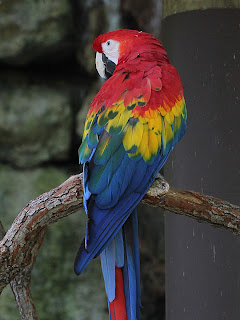
Macaw
Macaw
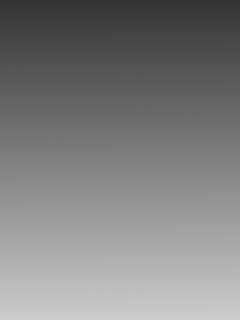
Grayscale Gradient
Grayscale Gradient


For each of the test images, I changed the layer mode of the upper layer to each mode and saved the result. I've included these images in each section below as references. What follows are my observations and thoughts about how to use each layer mode. Feel free to copy any of these images to your desktop so you can load them into GIMP for a closer look.

The layer modes are presented in the order in which they appear in the Mode drop-down menu. Here's a full list with quick links.

Normal Multiply Grain Extract
Dissolve Burn Grain Merge
Lighten Only      Overlay Divide
Screen Soft Light Hue
Dodge Hard Light Saturation
Addition Difference Color
Darken Only Subtract Value


04 December 2013

GIMP's Layer Modes (Somewhat) Demystified – Part 2: Darken Only to Subtract


In this article I discuss the following layer modes: Darken only, Multiply, Burn, Overlay, Soft light, Hard light, Difference, and Subtract. I will use the same test images I used for Part 1.


Color Patterns on Color Blocks
Roses on Macaw
Roses on Macaw
Macaw
Macaw
Grayscale Gradient
Grayscale Gradient

For each of the test images, I changed the layer mode of the upper layer to each mode and saved the result. I've included these images in each section below as references. What follows are my observations and thoughts about how to use each layer mode. Feel free to copy any of these images to your desktop so you can load them into GIMP for a closer look.

The layer modes are presented in the order in which they appear in the Mode drop-down menu. Here's a full list with quick links.

Normal Multiply Grain Extract
Dissolve Burn Grain Merge
Lighten Only      Overlay Divide
Screen Soft Light Hue
Dodge Hard Light Saturation
Addition Difference Color
Darken Only Subtract Value


20 November 2013

GIMP's Layer Modes (Somewhat) Demystified – Part 1: Normal to Addition


A reader recently commented that he didn't understand why there are so many layer modes in GIMP and he wondered just what one is supposed to do with all of them. Since I wasn't able to help right off the bat, I decided to do some research and experiment. Figuring stuff out for yourself is fun and I find that it burns in the knowledge. So what follows is the process I went through to try and understand more about layer modes.

First, I created a 900 x 1200 canvas in GIMP divided into six sections: light red, dark red, light blue, dark blue, light green, dark green. I varied the intensities of the colors a bit to make it easier to notice possible differences. The HSV and RGB numbers in each large block indicate the actual color values. On top of each color I put a grayscale gradient with a block of black on the left and a block of white on the right. I merged all of the small color blocks onto a transparent layer to make a test pattern layer above the six-color background. I thought this example would be useful for artists to see how layer modes affect colors.
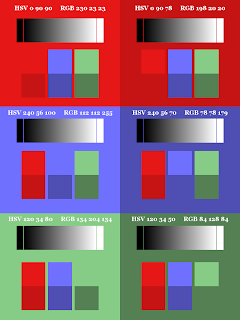

Color Patterns on Color Blocks


13 November 2013

GIMP Quickie No. 4 – Creating Color Pop on Midtone Grayscale


The following steps are for GIMP 2.8.

Step 1

  • Load image into GIMP and crop as desired.


Original Image of Orange Flowers
Original Image
Canon EOS 5D Mark III at f/4, 1/160 sec, ISO-100, 200 mm

11 October 2013

Question from the Audience – Sharpening a Selection

A Learning Experience


A reader asked me if it were possible to use the grain extract / grain merge sharpening technique on a selection. Taking the question literally and having never tried that before, I immediately opened GIMP and started experimenting. Let's go through the process of sharpening only the face of this African gray parrot and see what we learn.

African gray parrot
African gray parrot

09 October 2013

03 October 2013

A Non-Destructive, Adjustable Method for Cutting Out an Image

The Black and White of Masking


In a previous tutorial I described a way to cut out irregular images using the Free Select tool. I used to use that technique frequently, but it's very time consuming, causes a lot of work for the left-mouse-button finger, and leaves a sharp edge unless either you remember to feather the selection before deleting the cutout area or you use the Blur or Smudge tool to soften the edge. It's also destructive to the image and, if you make a mistake, it's painful to fix it.

I have since switched over to using masks. Not only is a mask quicker and easier to use, it doesn't affect the original image, so recovering from mistakes is simple, and if you use a soft brush you automatically get blurred edges. You want blurred edges so that the cutout image blends smoothly into whatever it's in front of.

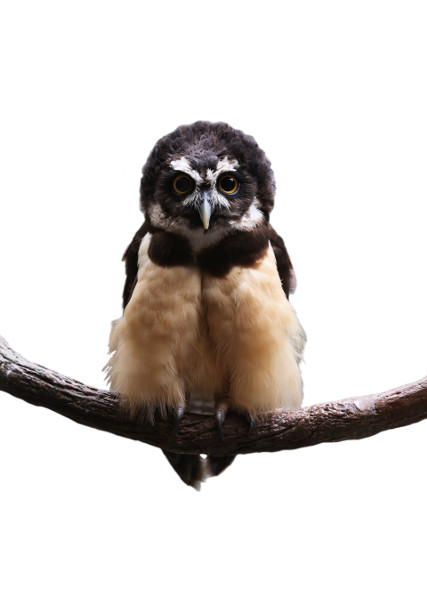
This tutorial describes how to create the following image using a mask to cut out the background.


Spectacled Owl with No Background
Let me give you my two hoots' worth.

25 September 2013

How to Create a Textured Background Using Color Functions and Bump Maps

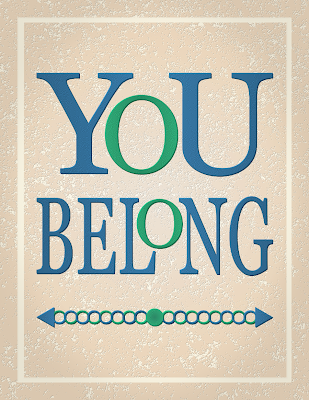
In a previous tutorial, I described a method of creating a background using overlays of various artistic GIMP filter effects. In this tutorial, I'll describe a method of creating a textured background with a 3D look, similar to the one in the following image, using a photo of some gray stone and various functions from the Colors menu combined with Bump Mapping.


You Belong Typographic Design


16 September 2013

How to Create Weathered Text on Wood

Let's say you want to create the look of text painted on a wooden board and you want the text to look like it's been out in the weather for a long while. There are several methods you can use to distress text. You can find some of them on the web by searching for “GIMP text”, plus one of the following words: weathered, distressed, worn.

This tutorial describes how to create the following image using a photo of a gray board, some text, and a photo of a rusty metal texture that is processed and turned into a layer mask. You can download the two photos (Weathered Gray Wood 0099 and Rusty Metal 0817) from the Free Images page of my blog.


Bear Foot Cabins Sign

06 September 2013

How to Create Lightning Bolts with GIMP


GIMP is really useful for adding special effects to photos and drawings. In this article I'll describe a simple method for creating lightning bolts that can then be resized, reoriented, scaled, or otherwise processed to fit into an image.


14 August 2013

Behind the Scene – Creation of a Seascape

Back in the autumn of 2012 I had seen a design on Zazzle that I liked quite a lot. It was a limited-palette, multicolored, layered, southwest United States-style design. I got the urge to create something using a similar concept, so after letting my subconscious mull it over for a bit I woke up one morning with the idea of a seascape and quickly made a sketch.


Original Seascape Sketch


30 July 2013

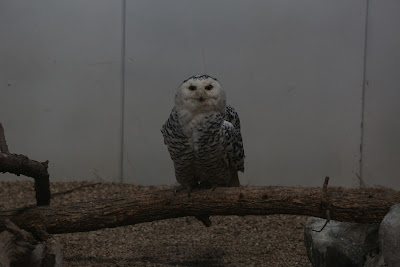
GIMP Quickie No. 2 – Creatively Rescuing a Poor Photo

Original Photo

  • Shot with a hand-held camera at the Tulsa Zoo through dingy glass in low light.
  • Camera: Canon EOS 5D Mark III
  • Lens: Canon Zoom Lens EF 70-200mm 1:2.8 L IS II USM
  • Settings: manual mode, f/5.6, 1/100 sec, ISO 800, 200mm, no flash
  • Image size: 5760 x 3840 px


Original Snowy Owl Photo

17 July 2013

Changing Brightness and Contrast Without Affecting Saturation

A Color Experiment


A while back I was made aware of an article on DPReview.com entitled Reducing Contrast Without the ColoursFading (using GIMP) wherein Tom Axford talks about the need for reducing the contrast in or otherwise brightening an image to make it look better in print. His original technique involved using an HSV model to make adjustments to a value layer without affecting the saturation of the colors in an image.

Intrigued by the concept, I decided to perform an experiment to see exactly what effect brightness and contrast adjustments have on colors. I created three squares, one each of red, green, and blue — red being lighter, green being darker, and blue being of medium intensity.

Initial Colors

18 June 2013

Using Color to Define the Focal Point of an Image with GIMP

Making the Balloons Pop!


Have you ever wanted to emphasize a particular part of a photo to make it stand out against a busy background? This intermediate-level GIMP tutorial describes a technique whereby you create a zone of color surrounded by a grayscale background to focus attention on the area of interest.

Specifically, I'll describe how to create this image:

Colored Balloons on a Grayscale Background


31 May 2013

How to Create a Textured Background Using GIMP Filters

What's Behind It All


What do you do if you have a nice photo of a person, animal, or other image, but the background is ugly or distracting, or you're really interested only in the main subject? Well, the first thing you can do is remove the background. (See Which Tool Should I Use to Cut Out an Irregular Image?) But then what? Now you have an image just hanging in space.

King Vulture Cutout Image
I feel like something is missing.

This novice-level tutorial explains one technique you can use to create a textured background for your image by using various GIMP filters and overlaid layers.

21 May 2013

A Non-Destructive Adjustable Way to Sharpen a Photo

Honing Your Photo-Sharpening Skills


A while back I read an article on gimpedtutorials.com called How to Make Images Super Sharp in Gimp 2.8. It's a shame this tutorial no longer exists because it contained some really useful techniques. Fortunately, I saved a list of the steps and have been using one of the methods fairly often to sharpen my photos. The nice thing about this method is that it involves using new layers and layer modes and doesn't make any changes to the original image. It's also easy to adjust the sharpness by simply sliding the layer opacity up and down until I like what I see.

I'll use this photo of fuzzy little prairie dogs to illustrate the steps for sharpening an image.

Prairie Dogs - Original Photo
Psst! Hey! Look at that!

15 April 2013

How to Create Layered Text with a Shiny Highlight in Inkscape

A Comparison of Inkscape with GIMP


After writing an article for GIMP called How to Create Layered Text with a Shiny Highlight in GIMP, I wondered what the difficulty level would be for doing the same thing in Inkscape. I decided to follow along with the original instructions from Shiny, Double-Beveled Text by Scott Kelby and Felix Nelson in the March 2004 issue of Photoshop User instead of reproducing the exact steps I used in GIMP.

The instructions below describe how to create this image using Inkscape version 0.48.2 r9819:


08 April 2013

How to Create Layered Text with a Shiny Highlight in GIMP

A GIMP Practice Exercise for Layers and Selections


I recently read an article called Shiny, Double-Beveled Text by Scott Kelby and Felix Nelson in the March 2004 issue of Photoshop User and thought it would be cool to reproduce the steps in GIMP as an exercise in translating Photoshop techniques into GIMP techniques. If you follow these instructions, you'll get some practice with creating and manipulating layers, using a mask on a layer, and creating and altering selections to achieve various effects.

One of the steps involves creating an outer glow. I describe a manual method for that, but if you already have a plugin that does outer glow you can use it instead.

The instructions below describe how to create this image:


02 April 2013

How to Replace the Sky in a Photo

A Simple GIMP 2.8 Tutorial


Have you ever had a nice outdoor picture of something, say a building, where the exposure on the building was good, but the sky looked drab, washed out, or overexposed, and you wondered what you could do to make the sky look better? You could replace the sky either with a simple solid blue color of the appropriate intensity or with a linear or radial blue gradient. Sometimes that's fine, but sometimes you'd like a different effect to make the image more interesting.

In this tutorial I'll describe a technique you can use to create this image:


Final Adjusted Sky

from this image:

Original Drab Sky


13 March 2013

How to Make a Pinwheel Pattern

A Gimp 2.8 Tutorial


A pinwheel is defined either as a toy that has a set of thin vanes that are arranged like a fan on the end of a stick and that spin like a wheel when air is blown on them, or as a type of firework that spins like a wheel. A pinwheel pattern is, similarly, a pattern that takes the form of vanes arranged regularly into a circular shape.

This novice-level tutorial describes how to create this pinwheel pattern.


Mallard Wing Pinwheel

from this vane-like image of a wing that was cut from a photo of a Mallard duck.

Mallard Wing


11 February 2013

One Method for Adjusting an Underexposed Photo

A GIMP 2.8 Quick Tutorial


I was perusing my zebra photos one day and came across one showing a zebra running away from me at full tilt. The photo was really underexposed, but I liked the dynamics of the image, so I loaded it into GIMP and started playing around with it.

What follows is a description of how I created this image:

Runaway Zebra Final

from this image:

Runaway Zebra Original

28 January 2013

GIMP 2.8 Tutorial: Which Tool Should I Use to Cut Out an Irregular Image?

GIMP Casual User Series — The Free Select Tool


Have you ever wanted to cut an irregular image out of a photograph, perhaps to put on a web page or use as part of a collage, but didn't know how to go about it or which tool to use? If so, read on for an exploration of GIMP's Free Select Tool.

Hibiscus Flower Original Image

For this tutorial I'll be using GIMP 2.8 and a photo of a yellow hibiscus flower, which you can download by clicking on the picture. (When you get to the full-sized image, drag it and drop it on your desktop.) It is assumed that you have some basic knowledge about GIMP, such as how to invoke it and load an image, how to navigate the menus, and how to save a file. By the end of this tutorial you should have a good feel for using the Free Select Tool to cut out images.